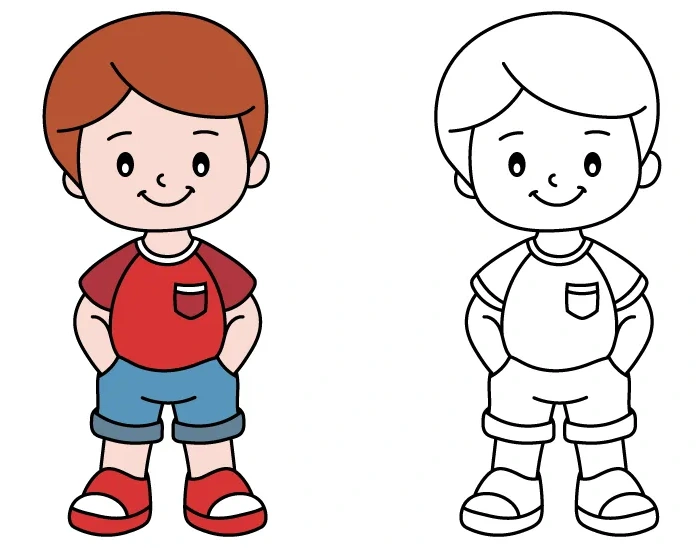
How to Draw a Boy? Step-by-Step Tutorial!
Our drawing journey continues! We have already learned how to draw many characters and objects together. In the previous episode, we drew a girl, so now we will learn how to draw a boy. There will be the same number of steps to follow and the level of difficulty is also quite similar. So if you managed the previous episode, you will definitely manage here too. So, pencils in hand and let’s get started!

Step 1
Let’s start drawing the boy by sketching his head.
Since this will be a cartoon-style drawing, the head will be relatively large compared to the rest of the body.

Step 2
The head will look nice with some nice hairdo.
To create it, you only need three rounded lines.

Step 3
No guide on drawing a boy would be complete without his facial features.
Start by adding ears that connect the hair to the cheeks.
Then, draw a smiling mouth and a small nose.

Step 4
Do you already know how to draw eyes?
If so, add them slightly above the nose.
If you find eyes tricky, practice them on a separate sheet of paper until you’re happy with the result, and then add them to your drawing.

Step 5
Below the head, draw a neck and the collar of a shirt.
The neck should be quite short — two tiny lines will do.

Step 6
Our boy will be wearing a sporty T-shirt.
Leave plenty of space on it for emblems or text to make the drawing even cooler.

Step 7
Next comes one of the trickiest parts — drawing a pair of shorts with cuffs at the bottom.
If you find this difficult, ask someone older for help or practice until you’re satisfied with the result.

Step 8
Once you’ve completed the previous step, things will get easier.
On each side of the T-shirt, add arms tucked into the pockets.

Step 9
You’re almost done drawing the boy, but there are a few final details to add.
Draw cuffs on the sleeves and a small pocket on the front of the T-shirt.

Step 10
Underneath the shorts, draw two straight lines for the boy’s legs.
Make sure they’re slightly narrower than the cuffs of the shorts.

Step 11
Below the legs, draw a pair of comfortable shoes.
There’s still one important detail missing — can you guess what it is?

Step 12
If you thought of shoelaces, not this time — it’s the soles!
And with that, our drawing journey is complete.
Your boy drawing is now finished!

Now you definitely know how to draw a boy child.
You already know how to draw a boy child.
That was a great job!
But the fun doesn’t have to end there.
You can also name the boy, think of the city he lives in, how old he is, and what he likes to eat.
Or maybe you have your own ideas of what else you can do with such a picture?


I love you