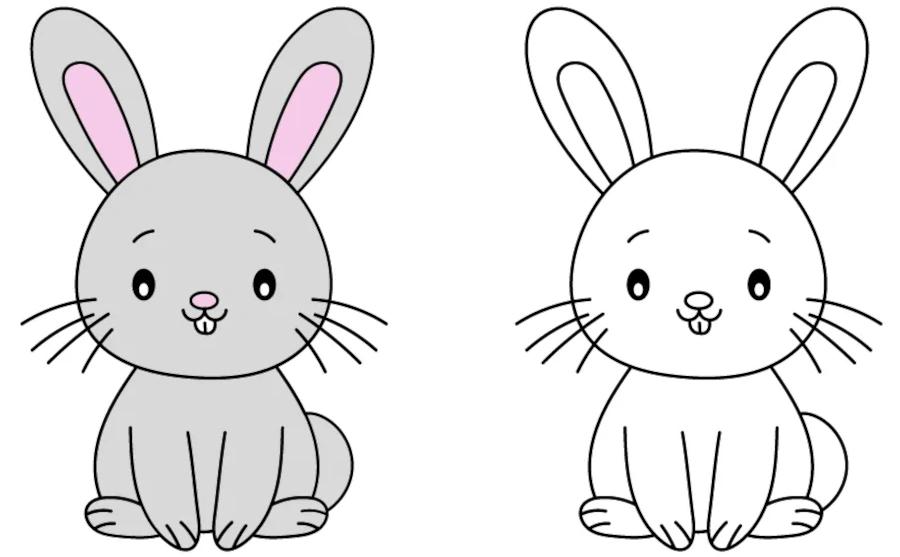
How to Draw a Rabbit? Step-by-Step Tutorial!
Do you want to learn how to draw a rabbit? We will help you! Below you will find a clear guide for children, with the help of which you can draw a cute rabbit in 11 steps. The next steps to perform have been marked with red lines. Perform them one by one, and the effect will certainly be very successful. Let’s get to work!

Step 1
We’ll start today’s drawing from the bottom.
These are the front legs of the rabbit.
They should be the same length and drawn close together.

Step 2
Right next to the front paws, draw the back legs.
You’ll notice these have a different shape and position — that’s intentional!
Also, add a short line connecting the front paws.

Step 3
In this step, add claws to the paws, giving your rabbit the tools it needs for digging.
Draw claws on both the front and back legs.

Step 4
Next, move upward to draw the rabbit’s body and tail.
The tail is large and rounded, while the body should also have a rounded shape, narrowing as it goes upward.

Step 5
Above the body, draw the rabbit’s head.
The shape is similar to a circle but slightly wider at the bottom and narrower at the top.

Step 6
In the lower part of the head, draw the nose along with two curved lines.
The lines should be symmetrical, mirroring each other.

Step 7
And now add a small but important detail: the rabbit’s tongue.

Step 8
Now it’s time for the eyes and eyebrows.
The eyes should be positioned at about the same height as the nose, with the eyebrows just above them.
If you find the eyes tricky, try practicing them separately on another sheet of paper or ask an adult for help.

Step 9
Enhance your rabbit’s face by adding whiskers, also known as vibrissae.
We’ve drawn four on each side of the face, but feel free to adjust the number as you like.

Step 10
The last major feature to draw is the rabbit’s long ears.
We started with the ear on the right side, but you can decide how long you want to make it.

Step 11
Finally, draw a matching ear on the left side to complete the rabbit.
And there you have it — a finished rabbit drawing!

Now you know how to draw a rabbit!
It wasn’t as difficult as it seemed at first, right?
Your drawing is also a coloring page.
So take your favorite crayons and color it to make it even prettier.


The best rabbit drawing tutorial available online. Easy steps, clearly explained and really cute rabbit! Recommended aven to smaller kids.